In order to create a countdown I needed to code a timer, again I needed to carry out some research to find the best way to do this. To work out that a second in time has passed the processor clicks need to be counted. If the number of processor clicks is greater than the number of clicks per second, then a second in time has passed.
The timer may also be used if I add a time counter to the game. This is not necessary and may make the scoring system more intricate. I may add a time counter to the game if I manage to get the rest of the essential coding done within the expected time limits.
To create the timer I have included the header file time.h and used the clock code in my game code.
Wednesday, 11 June 2008
Font experimentation
As the game needs to include text I have carried out some research into the font options available using OpenCV and then carried out some experiments with these.
Text items include: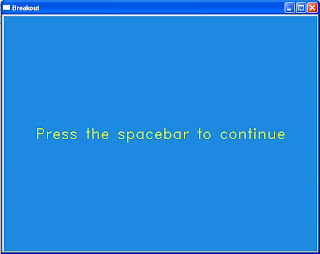
This is an example of the initialisation screen and the font used throughout the game.
Text items include:
- Initialisation
- Score
- Countdown
- Game over
- High score board

This is an example of the initialisation screen and the font used throughout the game.
State transition
Working from the initial state transition diagram that was presented in the project proposal and presentation, I coded eight states for the game. The states take the player through the game, linking one state to the next depending on the outcome of each game. For example, the game over state may lead to the enter high score state (if the score is greater than the lowest high score) or to the view high score state (if the score is lower than the lowest high score).
The states are:
The states are:
- Initialisation
- Startup
- Countdown
- Playing
- Game over
- Congratulations
- Enter high score
- View high score
Tuesday, 10 June 2008
Creating the ball
 The design ideas for the ball and testing suggested that the ball should be yellow, to ensure that it stands out against the background of the game board, the video image of the players.
The ball has the same diameter (in pixels) as the height of the paddle, to keep continuity and for aesthetic purposes. A small white rectangle has been added to the yellow ball to create a pseudo 3D effect and add detail to the ball.
The ball has been coded to move only within the borders of the game board. This required some mathematical work, to calculate the velocity of the ball, it's projected position from an initial state to the next during one time step, the distance the ball travels in the x and y axis in a single time step and when it should rebound from the border, accounting for the radius of the ball.
Creating the paddle
 The paddle consists of a rectangle and two circles, one at either end of the rectangle. This gives the paddle curved edges, which makes it more visually interesting than just a rectangular design.
The paddle is created using a number of variables. These variables are used to calculate the position of the paddle, the distances it can travel along the x axis inside of the game board and the way in which it interacts with the ball, through collision detection.
The design ideas for the paddle include a highlight and lowlight stripe in the code to add detail and to help create the pseudo 3D effect.
Creating the game board
 Having considered various screen sizes for the game I have decided to use a 640x480 window, as this is the largest available and will make the game easier to see.
Design ideas:
- Blue border along the top and the two vertical sides of the screen
- No border along the bottom of the screen, as falling off the bottom of the screen leads to the players losing a "life"
- 20 pixels in total in height (for top border) and in width (for vertical borders)
- Lighter blue and darker blue lines add pseudo 3D effect
- Each highlight or lowlight is made of three lines of varying length, to create the pseudo 3D effect
Image Processing
I've started to code the game by working on the image processing needed to capture the video signal from the web-cam, turning this into a binary Hue and Saturation image and also creating a flipped copy of the video image in it's original state.
The binary image is used to calculate the weighted-centroid of the bright pink colour of an AIBO ball. The AIBO ball is being used during development, whilst I wait for the larger pink gym ball to arrive.
The copy of the video image has been flipped and will used as the background for the game board, so that players can see themselves, as well as the gym ball. The players will be able to see that the way in which they move the gym ball has an effect on the paddle used in the game.
The binary image is used to calculate the weighted-centroid of the bright pink colour of an AIBO ball. The AIBO ball is being used during development, whilst I wait for the larger pink gym ball to arrive.
The copy of the video image has been flipped and will used as the background for the game board, so that players can see themselves, as well as the gym ball. The players will be able to see that the way in which they move the gym ball has an effect on the paddle used in the game.
Monday, 2 June 2008
State Transition Diagram

Initial state transition diagram, as in my major project proposal and presentation.
This will be referred to when planning the structure of my game and allows me to consider how one game screen relates to other game screens. I will use this to remind myself of the order in which I want the game screens to appear.

Planning
I've been busy planning my ideas for the project. I've been creating initial design ideas for the game board/screen and have been trying to work out where the objects will be placed on the screen, how they will interact with one another and specifiying some names for key variables.
The project is heavily based on mathematics, to understand the collision detection and spatial position of objects on the screen. I have been researching and working in my logbook at this planning stage so that I have firm ideas in place before trying to code the game.
The project is heavily based on mathematics, to understand the collision detection and spatial position of objects on the screen. I have been researching and working in my logbook at this planning stage so that I have firm ideas in place before trying to code the game.
Subscribe to:
Posts (Atom)
