Thank you to all those who came and took part in the testing event for Breakout: The Breakout on Monday, 18th of August. I hope that you all enjoyed playing the game and I really appreciate all of the feedback you gave.
Showing posts with label game. Show all posts
Showing posts with label game. Show all posts
Wednesday, 20 August 2008
Wednesday, 30 July 2008
Testing
The IOCT Masters Showcase Event at The Phoenix on Friday, 25th of July 2008 offered an opportunity to demonstrate the game and get feedback from players.
Feedback was extremely positive, with people staying to play the game for a while. Comments suggested that the game was interesting to play and once you had started playing you didn’t want to stop, and also suggested it would be better to play the game on a faster computer in order for the game to run slightly smoother. This is an issue I was already aware of and was just demonstrating the game on the laptop I have been using to code it on. Ideally, I would have demonstrated the game on a desktop computer, however, I did not have access to one during the event.
Other comments suggested that people liked the design of the bricks in the different levels, as I had created posters to show print screens of the different levels. People were keen to play the game and interested in how the object detection worked, asking about how the movement of the AIBO ball (used as I only had a limited space in which to demonstrate my work) controlled the paddle on the screen.
Feedback was extremely positive, with people staying to play the game for a while. Comments suggested that the game was interesting to play and once you had started playing you didn’t want to stop, and also suggested it would be better to play the game on a faster computer in order for the game to run slightly smoother. This is an issue I was already aware of and was just demonstrating the game on the laptop I have been using to code it on. Ideally, I would have demonstrated the game on a desktop computer, however, I did not have access to one during the event.
Other comments suggested that people liked the design of the bricks in the different levels, as I had created posters to show print screens of the different levels. People were keen to play the game and interested in how the object detection worked, asking about how the movement of the AIBO ball (used as I only had a limited space in which to demonstrate my work) controlled the paddle on the screen.
Startup screen
The startup screen is the first screen that the player sees. I wanted to create a bright, appealing image for the startup screen that also reflected the game. I tried some designs using Microsoft Paintbrush, as I wanted the graphics for this screen to be in keeping with the graphics in the rest of the game.
Designs from Microsoft Paintbrush:
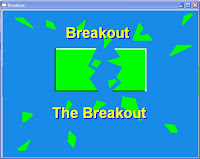
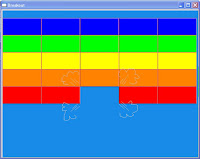
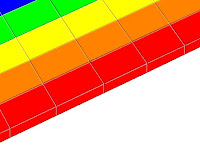
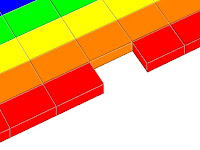
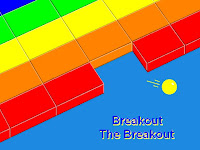
Having chosen a design I liked, I developed this and took the file into Adobe Photoshop to add a lighting effect and the titles. The effect and titles add to the creative effect of the image.
The final design for the startup screen: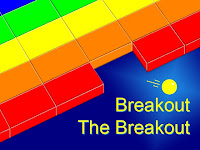
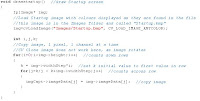
To use the image I have created as the startup screen I have used the “cvLoadImage” code to copy the image pixel by pixel, one colour channel at a time and load it to the screen.
Designs from Microsoft Paintbrush:


Having chosen a design I liked, I developed this and took the file into Adobe Photoshop to add a lighting effect and the titles. The effect and titles add to the creative effect of the image.
The final design for the startup screen:

To use the image I have created as the startup screen I have used the “cvLoadImage” code to copy the image pixel by pixel, one colour channel at a time and load it to the screen.

Congratulations screen
Something exciting/worthwhile needs to happen as part of the visuals for the congratulations screen in order for the player to want to complete the game. Following on from my idea to include the Cliff Richard tune “Congratulations” I have decided to create a dancing Cliff Richard for this screen.
In order to create the effect of a dancing Cliff Richard I began by trying to draw Cliff Richard using Microsoft Paintbrush. I was working on the idea of having two similar images and switching between the two, to create a dancing effect. To create an image of Cliff Richard I was referring to a video of his performance during the Eurovision Song Contest on YouTube.com. I then realised I would be able to take a few print screens of the video of Cliff Richard dancing and use these instead. From the print screens I found two similar images and cropped them to leave two images which when switched between gave the effect of Cliff Richard dancing.
I then began my research into how to load the two images to be displayed as part of the Congratulations screen and then switch between the two.
In the drawing file of my code I draw the Cliff Richard images to the screen, with an if statement relating to the toggle switch in the main Breakouy_v3.c file. The toggle allows the two images to be switched between, creating the effect of Cliff Richard dancing. In the drawing file I also had to flip the images of Cliff Richard vertically, as they were loading upside down before I added the cvFlip line of code.


In order to create the effect of a dancing Cliff Richard I began by trying to draw Cliff Richard using Microsoft Paintbrush. I was working on the idea of having two similar images and switching between the two, to create a dancing effect. To create an image of Cliff Richard I was referring to a video of his performance during the Eurovision Song Contest on YouTube.com. I then realised I would be able to take a few print screens of the video of Cliff Richard dancing and use these instead. From the print screens I found two similar images and cropped them to leave two images which when switched between gave the effect of Cliff Richard dancing.
I then began my research into how to load the two images to be displayed as part of the Congratulations screen and then switch between the two.
In the drawing file of my code I draw the Cliff Richard images to the screen, with an if statement relating to the toggle switch in the main Breakouy_v3.c file. The toggle allows the two images to be switched between, creating the effect of Cliff Richard dancing. In the drawing file I also had to flip the images of Cliff Richard vertically, as they were loading upside down before I added the cvFlip line of code.


Thursday, 24 July 2008
Gym ball
 I now have the gym ball, the main controller for the game. During code development I have been using an AIBO ball, as it is very similar in terms of hue and saturation. The AIBO ball has been extremely useful, not only because of it’s colour related properties, but also because of it’s size. The AIBO ball is far smaller than the gym ball and is therefore easier to use when sitting at the computer working on the code.
The larger gym ball will be used for the game, as planned, as I believe it offers the player a more interesting gaming experience than playing with the AIBO ball. Playing with the larger ball requires the player to stand further from the screen on which the game is displayed and in turn offers the opportunity to include more players at one time as the ball can be moved anywhere within the cameras viewing range.
Tuesday, 22 July 2008
Separating the code
Having all of the code for the game in one file was making working on the file difficult, especially when trying to find certain sections of the code. I have created a header file, which is then called by each of the other .c files, allowing them to compile.
The header file includes:

The code has been separated into suitable sections, with the .c files including:
The header file includes:
- Libraries and includes
- Define constants
- Structures
- Global variables
- Game items
- Image
- Function prototypes

The code has been separated into suitable sections, with the .c files including:
- Breakout_v3.c
- Breakout_v3.h
- Collision_Detection.c
- Drawing.c
- High_Score.c
- Levels.c
- Sound.c
Tuesday, 8 July 2008
Music
Having added sound effects to the game and understood how the MIDI signals can be used, I have also decided to include some musical elements. I feel the introduction to the game and the congratulations screen would benefit from having music playing alongside the visual image.
For the congratulations screen, I feel it appropriate to use Cliff Richard's "Congratulations". In order to code this, I researched and found a piano score on the Internet to find which notes are used in the chorus, the length of the notes and where the rests are in each bar. I then used a conversion list to convert the pitch musical notes into code and was able to write a piece of code to play the chorus of "Congratulations".
Here is the code I wrote for "Congratulations":
For the congratulations screen, I feel it appropriate to use Cliff Richard's "Congratulations". In order to code this, I researched and found a piano score on the Internet to find which notes are used in the chorus, the length of the notes and where the rests are in each bar. I then used a conversion list to convert the pitch musical notes into code and was able to write a piece of code to play the chorus of "Congratulations".
Here is the code I wrote for "Congratulations":

Sound
I have carried out some research into the use of sound in game and have decided to add sound to the game, to make playing the game a more interesting experience, as it involves more of the senses.
Times in the game that may benefit from sound:
Times in the game that may benefit from sound:
- Ball and border collision
- Ball and paddle collision
- Ball and brick collision
- Brick explosion
- Losing a “life”
- Completing a level
- Congratulation state
- During the countdown
- Introduction to the game
Wednesday, 2 July 2008
Meeting with Project Supervisor
Meeting with Project Supervisor, Mohammad Ibrahim
Friday 19th June
2.15pm
I demonstrated a version of my work and talked Mohammad through the code. I answered questions relating to the working process and the code itself. We discussed possible directions for the project, such as potentially adding sound. I had not previously considered incorporating sound into the game, as I was not sure exactly how tight time constraints would be (having never programmed a game before), however, Mohammad believes that I am working and progressing well and may have time to add additional aspects to the game.
Friday 19th June
2.15pm
I demonstrated a version of my work and talked Mohammad through the code. I answered questions relating to the working process and the code itself. We discussed possible directions for the project, such as potentially adding sound. I had not previously considered incorporating sound into the game, as I was not sure exactly how tight time constraints would be (having never programmed a game before), however, Mohammad believes that I am working and progressing well and may have time to add additional aspects to the game.
Monday, 30 June 2008
Brick design
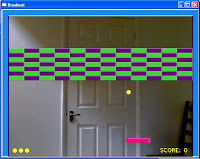
Having considered the measurement of the game play area, the number of pixels between the left and right borders and the number of pixels between the top border and the top edge of the paddle, I tried to divide the play area to include a suitable number of bricks. I have decided to have a brick grid consisting of 12 x 7 bricks.
Each of the three levels in the game has a different brick design pattern, these are:
Level 1 = Green and purple checkerboard
Level 2 = Rainbow in horizontal colour-bands
Level 3 = White with green squares spelling “IOCT”
 Level 1

Level 2
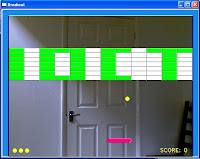
Level 3
Each of the bricks uses three colours, a main colour, a highlight colour and lowlight colour. The use of three colours creates the pseudo 3D effect, used throughout the game.
Each of the three levels in the game has a different brick design pattern, these are:
Level 1 = Green and purple checkerboard
Level 2 = Rainbow in horizontal colour-bands
Level 3 = White with green squares spelling “IOCT”
 Level 1
Level 2

Level 3
Each of the bricks uses three colours, a main colour, a highlight colour and lowlight colour. The use of three colours creates the pseudo 3D effect, used throughout the game.
Levels
There are three levels in the game. Each level must be completed, by deleting all of the bricks in the level before the player can progress to the next level. Each level has a different brick design, to make the difference between the levels clear visually.
The levels also differ in the ease with which they are completed. This increases the difficulty rate of each level as the player progresses through the game.
Level 1 = Each brick hit once then it's deleted
Level 2 = Each brick hit twice then it's deleted
Level 3 = Each brick hit three times then it's deleted
The levels also differ in the ease with which they are completed. This increases the difficulty rate of each level as the player progresses through the game.
Level 1 = Each brick hit once then it's deleted
Level 2 = Each brick hit twice then it's deleted
Level 3 = Each brick hit three times then it's deleted
Monday, 16 June 2008
High score board
To understand how to create the High Score Board I needed to research this topic and how score boards are created for computer games. The scores need to be saved in a separate text file. The file is loaded into the structure of the memory at the beginning of the game.
I have structured the text files as follows:
Name (3 characters) Tab Score
To write the headings, “High Score Board”, “Name” and “Score” to the screen I used the sprintf code. I’ve also used the sprintf code in printing the text from the separate file to the screen.
To read the information from the separate file I have used the fscanf code. I began by pointing the computer to the relevant file and have created an integer variable to deal with the scores and a character variable to deal with the names. The code used then opens the relevant file and reads it: fileHandle – fopen(“highscores.txt”, “r”);
I then read the string, tab across, integer and create a new line. This points to the name and score strings. A copy of the name and score are then created. This process is repeated three times to then be used in displaying the names and scores of the three highest scorers.
I have structured the text files as follows:
Name (3 characters) Tab Score
To write the headings, “High Score Board”, “Name” and “Score” to the screen I used the sprintf code. I’ve also used the sprintf code in printing the text from the separate file to the screen.
To read the information from the separate file I have used the fscanf code. I began by pointing the computer to the relevant file and have created an integer variable to deal with the scores and a character variable to deal with the names. The code used then opens the relevant file and reads it: fileHandle – fopen(“highscores.txt”, “r”);
I then read the string, tab across, integer and create a new line. This points to the name and score strings. A copy of the name and score are then created. This process is repeated three times to then be used in displaying the names and scores of the three highest scorers.
Wednesday, 11 June 2008
Developing ball movement
The movement of the ball is based on the mathematical principles of trigonometry and Pythagoras theorem, so these principles were researched.
 h = overall velocity of the ball (the hypotenuse)
x = x component of the ball velocity
y = y component of the ball velocity
0 = theta, angle of the path of the ball, set to a randomly generated number between 35o and 55o
x = sin 0 * h
y = cos 0 * h
Trigonometry:
Trigonometry can be used to calculate angles. In right-angled triangles, where there is a hypotenuse, the term SOHCAHTOA can be used:
Pythagoras theorem:
In a right-angled triangle, the hypotenuse is equal to the sum of the other two sides. Often written as: a2+b2=c2
Random number generation:
For the ball to leave the paddle at the start of each game using a different angle, a random number between two set boundary numbers should be generated and control the ball’s initial movement. The boundary numbers are 35o and 55o as these were considered suitable angles between which to project the ball from the paddle.
To create a random number between these boundaries the srand code is implemented to initialise the random number generator, using processor clicks, as these values are different every time the program runs. The boundary angles are then set and the angle must be between these values, it is then multiplied by 2pi/360, and converted to radians. The ball velocity in x and y are then calculated and the remainder of the random number is divided by 2, giving an answer of 0 or 1, allowing the x component to be reversed, changing to direction the ball takes as it leaves the paddle.
 h = overall velocity of the ball (the hypotenuse)
x = x component of the ball velocity
y = y component of the ball velocity
0 = theta, angle of the path of the ball, set to a randomly generated number between 35o and 55o
x = sin 0 * h
y = cos 0 * h
Trigonometry:
Trigonometry can be used to calculate angles. In right-angled triangles, where there is a hypotenuse, the term SOHCAHTOA can be used:
- SOH = sine = opposite/hypotenuse
- CAH = cosine = adjacent/hypotenuse
- TOA = tan = opposite/adjacent
Pythagoras theorem:
In a right-angled triangle, the hypotenuse is equal to the sum of the other two sides. Often written as: a2+b2=c2
Random number generation:
For the ball to leave the paddle at the start of each game using a different angle, a random number between two set boundary numbers should be generated and control the ball’s initial movement. The boundary numbers are 35o and 55o as these were considered suitable angles between which to project the ball from the paddle.
To create a random number between these boundaries the srand code is implemented to initialise the random number generator, using processor clicks, as these values are different every time the program runs. The boundary angles are then set and the angle must be between these values, it is then multiplied by 2pi/360, and converted to radians. The ball velocity in x and y are then calculated and the remainder of the random number is divided by 2, giving an answer of 0 or 1, allowing the x component to be reversed, changing to direction the ball takes as it leaves the paddle.
Coding a timer
In order to create a countdown I needed to code a timer, again I needed to carry out some research to find the best way to do this. To work out that a second in time has passed the processor clicks need to be counted. If the number of processor clicks is greater than the number of clicks per second, then a second in time has passed.
The timer may also be used if I add a time counter to the game. This is not necessary and may make the scoring system more intricate. I may add a time counter to the game if I manage to get the rest of the essential coding done within the expected time limits.
To create the timer I have included the header file time.h and used the clock code in my game code.
The timer may also be used if I add a time counter to the game. This is not necessary and may make the scoring system more intricate. I may add a time counter to the game if I manage to get the rest of the essential coding done within the expected time limits.
To create the timer I have included the header file time.h and used the clock code in my game code.
Font experimentation
As the game needs to include text I have carried out some research into the font options available using OpenCV and then carried out some experiments with these.
Text items include: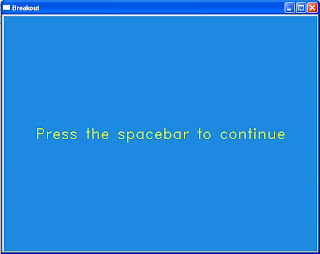
This is an example of the initialisation screen and the font used throughout the game.
Text items include:
- Initialisation
- Score
- Countdown
- Game over
- High score board

This is an example of the initialisation screen and the font used throughout the game.
State transition
Working from the initial state transition diagram that was presented in the project proposal and presentation, I coded eight states for the game. The states take the player through the game, linking one state to the next depending on the outcome of each game. For example, the game over state may lead to the enter high score state (if the score is greater than the lowest high score) or to the view high score state (if the score is lower than the lowest high score).
The states are:
The states are:
- Initialisation
- Startup
- Countdown
- Playing
- Game over
- Congratulations
- Enter high score
- View high score
Tuesday, 10 June 2008
Creating the game board
 Having considered various screen sizes for the game I have decided to use a 640x480 window, as this is the largest available and will make the game easier to see.
Design ideas:
- Blue border along the top and the two vertical sides of the screen
- No border along the bottom of the screen, as falling off the bottom of the screen leads to the players losing a "life"
- 20 pixels in total in height (for top border) and in width (for vertical borders)
- Lighter blue and darker blue lines add pseudo 3D effect
- Each highlight or lowlight is made of three lines of varying length, to create the pseudo 3D effect
Image Processing
I've started to code the game by working on the image processing needed to capture the video signal from the web-cam, turning this into a binary Hue and Saturation image and also creating a flipped copy of the video image in it's original state.
The binary image is used to calculate the weighted-centroid of the bright pink colour of an AIBO ball. The AIBO ball is being used during development, whilst I wait for the larger pink gym ball to arrive.
The copy of the video image has been flipped and will used as the background for the game board, so that players can see themselves, as well as the gym ball. The players will be able to see that the way in which they move the gym ball has an effect on the paddle used in the game.
The binary image is used to calculate the weighted-centroid of the bright pink colour of an AIBO ball. The AIBO ball is being used during development, whilst I wait for the larger pink gym ball to arrive.
The copy of the video image has been flipped and will used as the background for the game board, so that players can see themselves, as well as the gym ball. The players will be able to see that the way in which they move the gym ball has an effect on the paddle used in the game.
Monday, 2 June 2008
State Transition Diagram

Initial state transition diagram, as in my major project proposal and presentation.
This will be referred to when planning the structure of my game and allows me to consider how one game screen relates to other game screens. I will use this to remind myself of the order in which I want the game screens to appear.
Subscribe to:
Posts (Atom)
